a
Structure of backend application, introduction to testing
Let's continue our work on the backend of the tasks application we started in part 3.
This means that you can continue editing the repo that you have from lab3 for continuing to edit the reading.
Project structure
FYI: This course material was originally written with version 18 of Node.js, but most of it has been adapted recently to use 22.21.1. If you are using NVM, you can always switch, but you can also just stick with 22.21 for now.
Before we move into the topic of testing, we will modify the structure of our project to adhere to Node.js best practices.
The following section will be devoted to walking us through restructuring our project.
FYI: By the time we reach the recap section, the directory structure of our project will look like this:
├── controllers
│   └── tasks.js
├── dist
│   └── ...
├── models
│   └── task.js
├── utils
│   ├── config.js
│   ├── logger.js
│   └── middleware.js
├── app.js
├── index.js
├── package.json
├── package-lock.json
Before we get started, know that when you ask WebStorm to make a file, and you type dir/file, WebStorm will automatically create the directory if it doesn't exist.
You just need to make sure the correct directory is selected before you begin.
Let's get started!
utils/logger.js
So far we have been using console.log and we gently introduced console.error to print different information from the code.
However, there are better tricks we can use to go beyond console.log.
Let's go one step closer to best practices and separate all console printing to the module utils/logger.js
const info = (...params) => {
  console.log(...params);
};

const error = (...params) => {
  console.error(...params);
};

module.exports = { info, error }
The logger has two functions, info for printing normal log messages, and error for all error messages.
Extracting logging into its own module is a good idea in several ways. If we wanted to start writing logs to a file or send them to an external logging service like graylog or papertrail we would only have to make changes in one place.
index.js
The contents of the index.js file used for starting the application gets simplified as follows:
const app = require("./app"); // the actual Express application
const http = require("http");
const config = require("./utils/config");
const logger = require("./utils/logger");

const server = http.createServer(app);

server.listen(config.PORT, () => {
  logger.info(`Server running on port ${config.PORT}`);
});
The index.js file only imports the actual application from the app.js file and then starts the application.
The function info of the logger module is used for the console printout telling that the application is running.
Now the Express app and the code taking care of the web server are separated from each other following best practices. One of the advantages of this method is that the application can now be tested at the level of HTTP API calls without actually making calls via HTTP over the network, this makes the execution of tests faster.
utils/config.js
The handling of environment variables is extracted into a separate utils/config.js file:
require("dotenv").config();

const PORT = process.env.PORT;
const MONGODB_URI = process.env.MONGODB_URI;

module.exports = { MONGODB_URI, PORT }
The other parts of the application can access the environment variables by importing the configuration module:
const config = require("./utils/config");

logger.info(`Server running on port ${config.PORT}`);
controllers/tasks.js
The route handlers have also been moved into a dedicated module. The event handlers of routes are commonly referred to as controllers, and for this reason, we have created a new controllers directory. All of the routes related to tasks are now in the controllers/tasks.js module:
const tasksRouter = require("express").Router();
const Task = require("../models/task");

tasksRouter.get("/", (request, response) => {
  Task.find({}).then(tasks => {
    response.json(tasks);
  });
});

tasksRouter.get("/:id", (request, response, next) => {
  Task.findById(request.params.id)
    .then(task => {
      if (task) {
        response.json(task);
      } else {
        response.status(404).end();
      }
    })
    .catch(error => next(error));
});

tasksRouter.post("/", (request, response, next) => {
  const body = request.body;

  const task = new Task({
    content: body.content,
    important: Boolean(body.important) || false,
    date: new Date()
  });

  task.save()
    .then(savedTask => {
      response.json(savedTask);
    })
    .catch(error => next(error));
});

tasksRouter.delete("/:id", (request, response, next) => {
  Task.findByIdAndDelete(request.params.id)
    .then(() => {
      response.status(204).end();
    })
    .catch(error => next(error));
});

tasksRouter.put('/:id', (request, response, next) => {
  const { content, important } = request.body;

  Task.findById(request.params.id)
    .then(task => {
      if (!task) {
        return response.status(404).end();
      }

      task.content = content;
      task.important = important;

      return task.save().then((updatedTask) => {
        response.json(updatedTask);
      });
    })
    .catch(error => next(error));
});

module.exports = tasksRouter;
This is almost an exact copy-paste of our previous index.js file.
However, there are a few significant changes. At the very beginning of the file, we create a new router object:
const tasksRouter = require("express").Router();

//...

module.exports = tasksRouter;
The module exports the router to be available for all consumers of the module.
All routes are now defined for the router object, similar to what we did before with the object representing the entire application.
It's worth noting that the paths in the route handlers have shortened. In the previous version, we had:
app.delete("/api/tasks/:id", (request, response, next) => {Now in the current version, we have:
tasksRouter.delete("/:id", (request, response, next) => {So what are these router objects exactly? The Express manual provides the following explanation:
A router object is an isolated instance of middleware and routes. You can think of it as a "mini-application," capable only of performing middleware and routing functions. Every Express application has a built-in app router.
The router is a middleware, that can be used for defining "related routes" in a single place, which is typically placed in its own module.
app.js
The app.js file that creates the actual application takes the router into use as shown in this code snippet:
const tasksRouter = require("./controllers/tasks");
app.use("/api/tasks", tasksRouter);
The router we defined earlier is used if the URL of the request starts with /api/tasks.
For this reason, the tasksRouter object must only define the relative parts of the routes, i.e. the empty path / or just the parameter /:id.
A file defining the application, our app.js, has been created in the root of the repository:
const express = require("express");
const mongoose = require("mongoose").set("strictQuery", true);
const config = require("./utils/config");
const logger = require("./utils/logger");
const middleware = require("./utils/middleware");
const tasksRouter = require("./controllers/tasks");

const app = express();

logger.info("connecting to", config.MONGODB_URI);

mongoose
  .connect(config.MONGODB_URI, { family: 4 })
  .then(() => {
    logger.info("connected to MongoDB");
  })
  .catch((error) => {
    logger.error("error connecting to MongoDB:", error.message);
  });

app.use(express.static("dist"));
app.use(express.json());
app.use(middleware.requestLogger);

app.use("/api/tasks", tasksRouter);

app.use(middleware.unknownEndpoint);
app.use(middleware.errorHandler);

module.exports = app;
The file takes different middleware into use, and one of these is the tasksRouter that is attached to the /api/tasks route.
utils/middleware.js
Our custom middleware has been moved to a new utils/middleware.js module:
const logger = require("./logger");

const requestLogger = (request, response, next) => {
  logger.info("Method:", request.method);
  logger.info("Path:  ", request.path);
  logger.info("Body:  ", request.body);
  logger.info("---");
  next();
};

const unknownEndpoint = (request, response) => {
    response.status(404).send({ error: "unknown endpoint" });
};

const errorHandler = (error, request, response, next) => {
  logger.error(error.message);

  if (error.name === "CastError") {
    return response.status(400).send({ error: "malformatted id" });
  } else if (error.name === "ValidationError") {
    return response.status(400).json({ error: error.message });
  }

  next(error);
};

module.exports = {
  requestLogger,
  unknownEndpoint,
  errorHandler
};
The responsibility of establishing the connection to the database has been given to the app.js module.
models/task.js
The models/task.js only defines the Mongoose schema for tasks.
const mongoose = require("mongoose");

const taskSchema = new mongoose.Schema({
  content: {
    type: String,
    required: true,
    minlength: 5
  },
  date: {
    type: Date,
    required: true,
  },
  important: Boolean,
});

taskSchema.set("toJSON", {
  transform: (document, returnedObject) => {
    returnedObject.id = returnedObject._id.toString();
    delete returnedObject._id;
    delete returnedObject.__v;
  }
});

module.exports = mongoose.model("Task", taskSchema);
Directory Structure Recap
To recap, the directory structure looks like this after the changes have been made:
├── controllers
│   └── tasks.js
├── dist
│   └── ...
├── models
│   └── task.js
├── utils
│   ├── config.js
│   ├── logger.js
│   └── middleware.js
├── app.js
├── index.js
├── package-lock.json
├── package.json
For smaller applications, the structure does not matter that much. Once the application starts to grow in size, you must establish a structure and separate the different responsibilities of the application into separate modules. This will make developing the application much easier.
There is no strict directory structure or file naming convention that is required for Express applications. In contrast, other frameworks like Ruby on Rails do require a specific structure. Our current structure merely tries to adhere to best practices (according to the Internet).
You can find the code for our current application in its entirety in the part4-1 branch of this GitHub repository.
If you clone the project for yourself, run the npm install command before starting the application with npm run dev.
Notice about exports
We have used two different kinds of exports in this part. Firstly, e.g. the file utils/logger.js does the export as follows:
const info = (...params) => {
  console.log(...params);
};

const error = (...params) => {
  console.error(...params);
};

module.exports = { info, error }
Exporting a bundled object
utils/logger.js exports an object that has two fields, both of which are functions.
The functions can be used in two different ways.
The first option is to require the whole object and refer to functions through the object using the dot notation:
const logger = require("./utils/logger");

logger.info("message");

logger.error("error message");
The second option is to destructure the functions to variables in the require statement:
const { info, error } = require("./utils/logger");

info("message");
error("error message");
I would recommend destructuring when only a small portion of those exported functions would be needed.
Exporting a single value
While utils/logger.js exports multiple functions, it is also common to export a single object. As an example, let's revisit controller/tasks.js:
const tasksRouter = require("express").Router();
const Task = require("../models/task");

// ...

module.exports = tasksRouter;
Since there is just one object exported, we must import the entire object to use it:
const tasksRouter = require("./controllers/tasks");

// ...

app.use("/api/tasks", tasksRouter);
Now the exported object is assigned to the variable tasksRouter and used as such.
Finding the usages of your files with WebStorm
WebStorm allows you to search for usages in your code. This can be very helpful for refactoring. For example, if you decide to split a function into two separate functions, your code could break if you don't modify all the usages. This is difficult if you don't know where all of those usages are.
To find usages for any functions or variables, you can go to Edit->Find Usages->Find Usages in File and then search based on a variety of criteria. Try this in your code before moving on!
Testing Node applications
We have completely neglected one essential area of software development, and that is automated testing.
Let's start our testing journey by looking at unit tests using some unrelated code. Create a new file utils/for_testing.js and write a couple of simple functions that we can use for test writing practice:
const reverse = (string) => {
  return string
    .split("")
    .reverse()
    .join("");
};

const average = (array) => {
  const reducer = (sum, item) => {
    return sum + item;
  };

  return array.reduce(reducer, 0) / array.length;
};

module.exports = {
  reverse,
  average,
};
The
averagefunction uses thearray.reducemethod. If that method is not familiar to you yet, then now is a good time to watch the first three videos from the Functional Javascript series on Youtube.
There are many different testing libraries or test runners available for JavaScript. The old king of test libraries is Mocha, which was replaced a few years ago by Jest. A newcomer to the libraries is Vitest, which bills itself as a new generation of test libraries.
Nowadays, Node also has a built-in test library node:test, which is well suited to the needs of the course.
Let's define the npm script test for the test execution:
{
  // ...
  "scripts": {
    "start": "node index.js",
    "dev": "node --watch index.js",
    "test": "node --test",    "lint": "eslint ."
  },
  // ...
}
Let's create a separate directory for our tests called tests and create a new file called reverse.test.js with the following contents:
const { test } = require("node:test");
const assert = require("node:assert");

const reverse = require("../utils/for_testing").reverse;

test("reverse of a", () => {
  const result = reverse("a");

  assert.strictEqual(result, "a");
});

test("reverse of react", () => {
  const result = reverse("react");

  assert.strictEqual(result, "tcaer");
});

test("reverse of releveler", () => {
  const result = reverse("releveler");

  assert.strictEqual(result, "releveler");
});
Let's now examine the file.
The test defines the keyword test and the library assert,
which is used by the tests to check the results of the functions under test.
The next line imports the function to be tested and assigns it to a variable called reverse:
const reverse = require("../utils/for_testing").reverse;Individual test cases are defined with the test function.
The first argument of the function is the test description as a string.
The second argument is a function that defines the functionality for the test case.
The functionality for the second test case looks like this:
() => {
  const result = reverse("react");

  assert.strictEqual(result, 'tcaer');
};
First, we execute the code to be tested, meaning that we generate a reverse for the string react.
Next, we verify the results with the
strictEqual function
of the assert library.
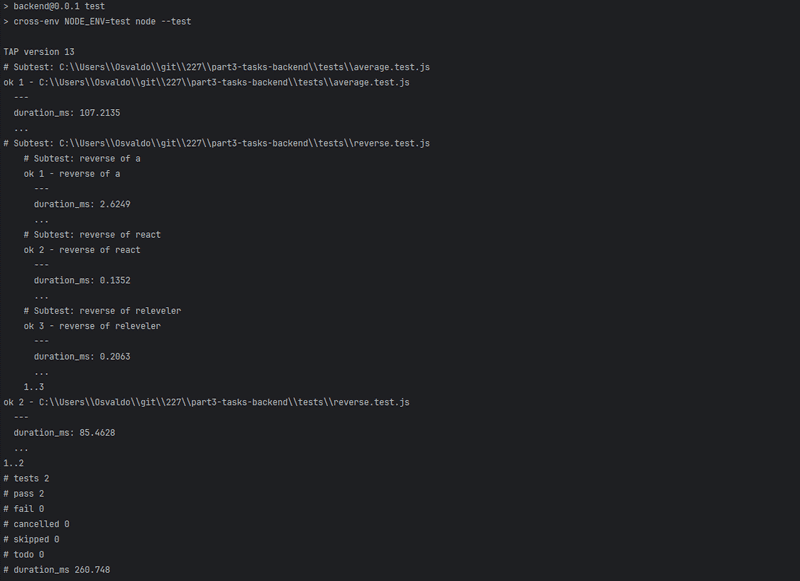
As expected, all of the tests pass:
In the course, we follow the convention where test file names end with .test.js, as the node:test testing library automatically executes test files named this way.
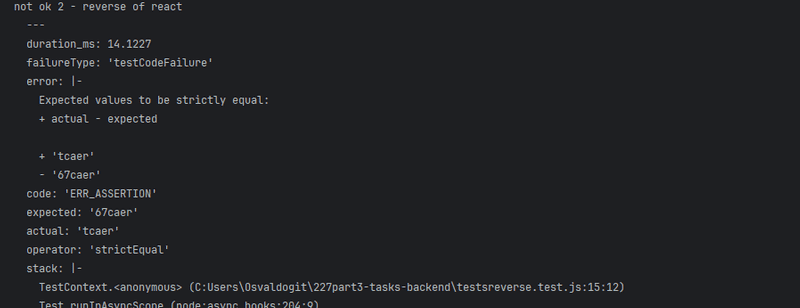
Let's break the test by changing the expected result from tcaer to the incorrect 67caer:
test("reverse of react", () => {
  const result = reverse("react");

  assert.strictEqual(result, "67caer");
});
Running this test results in the following error message:
Change the test back.
Let's add a few tests for the average function, into a new file tests/average.test.js:
const { test, describe } = require("node:test");
const assert = require("node:assert");
const average = require("../utils/for_testing").average;
describe("average", () => {
test("of one value is the value itself", () => {
assert.strictEqual(average([1]), 1);
});
test("of many is calculated right", () => {
assert.strictEqual(average([1, 2, 3, 4, 5, 6]), 3.5);
});
test("of empty array is zero", () => {
assert.strictEqual(average([]), 0);
});
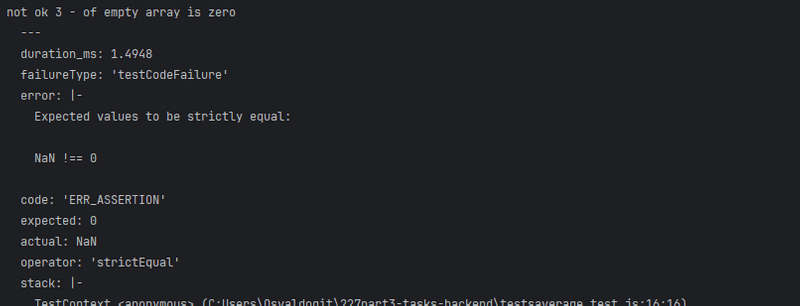
});The test reveals that the function does not work correctly with an empty array (this is because in JavaScript dividing by zero results in NaN):
Fixing the function in utils/for_testing.js requires one change:
const average = array => {
  const reducer = (sum, item) => {
    return sum + item;
  }

  return array.length === 0
    ? 0
    : array.reduce(reducer, 0) / array.length;
};
If the length of the array is 0 then we return 0, and in all other cases, we use the reduce method to calculate the average.
There are a few things to notice about the tests that we just wrote.
We defined a describe block around the tests that were given the name average:
describe("average", () => {
  // tests
});
Describe blocks can be used for grouping tests into logical collections.
The test output also uses the name of the describe block:
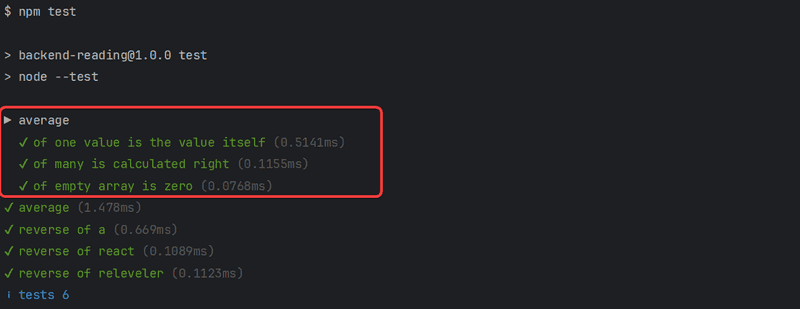
As we will see later on describe blocks are necessary when we want to run some shared setup or teardown operations for a group of tests.
Another thing to notice is that we wrote the tests in quite a compact way, without assigning the output of the function being tested to a variable:
test("of empty array is zero", () => {
  assert.strictEqual(average([]), 0);
});
Exercises 4.3-4.7
Let's create a collection of helper functions that are meant to assist in dealing with the show watchlist. Create the functions into a file called utils/list_helper.js. Write your tests into an appropriately named test file under the tests directory.
4.3: Helper functions and Unit tests, Step 1
First, define a dummy function that receives an array of shows as a parameter and always returns the value 1.
The contents of the list_helper.js file at this point should be the following:
const dummy = (shows) => {
  // ...
};

module.exports = {
  dummy
};
Verify that your test configuration works with the following test:
const { test, describe } = require("node:test");
const assert = require("node:assert");
const listHelper = require("../utils/list_helper");

test("dummy returns one", () => {
  const shows = [];

  const result = listHelper.dummy(shows);
  assert.strictEqual(result, 1);
});
4.4: Helper functions and unit tests, Step 2
Define a new totalLikes function that receives a list of shows as a parameter.
The function returns the total sum of likes in all of the shows.
Write appropriate tests for the function.
It's recommended to put the tests inside of a describe block so that the test report output gets grouped nicely:
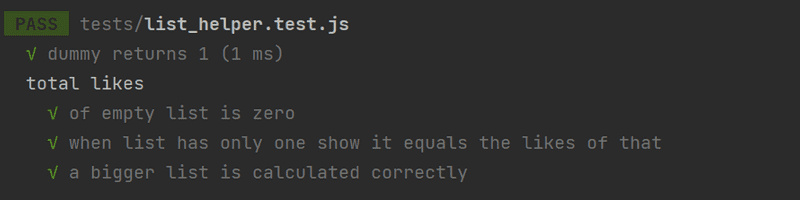
Defining test inputs for the function can be done like this:
describe("total likes", () => {
  const listWithOneShow = [
    {
      _id: "5a422aa71b54a676234d17f8",
      title: "Arrested Development",
      genre: "Comedy",
      url: "https://www.netflix.com/title/70140358",
      likes: 5,
      __v: 0
    }
  ];

  test("when list has only one show, equals the likes of that", () => {
    const result = listHelper.totalLikes(listWithOneShow);
    assert.strictEqual(result, 5);
  });
});
If defining your own test input list of shows is too much work, you can use the ready-made list.
You are bound to run into problems while writing tests. Remember the things that we learned about debugging in part 3. You can use the debugger or print things even during test execution.
4.5*: Helper functions and unit tests, Step 3
Define a new favoriteShow function that receives a list of shows as a parameter.
The function finds out which show has the most likes.
If there are many top favorites, it is enough to return one of them.
The value returned by the function could be in the following format:
{
  title: "Community",
  genre: "Comedy",
  likes: 12
}
Pertinent when you are comparing objects, the
deepStrictEqualmethod is probably what you want to use, as it ensures that the objects have the same attributes. For differences between various assert module functions, you can refer to this Stack Overflow answer.
Write the tests for this exercise inside of a new describe block.
Do the same for the remaining exercises as well.
4.6*: Helper functions and Unit tests, Step 4
This and the next exercise are a little bit more challenging. Finishing these two exercises is not required to advance in the course material, so it may be a good idea to return to these once you're done going through the material for this part in its entirety.
Finishing this exercise can be done without the use of additional libraries. However, this exercise is a great opportunity to learn how to use the Lodash library.
Define a function called mostShows that receives an array of shows as a parameter.
The function returns the genre that has the largest number of shows.
The return value also contains the number of shows the top genre has:
{
  genre: "Drama",
  shows: 3
}
If there are many top genres, then it is enough to return any one of them.
4.7*: Helper functions and Unit tests, Step 5
Define a function called mostLikes that receives an array of shows as its parameter.
The function returns the genre whose shows collectively have the largest number of likes.
The return value also contains the total number of likes that the genre has received:
{
  genre: "Comedy",
  likes: 17
}
If there are many top genres, then it is enough to show any one of them.